Getting Started with Engagely
- Sign up for Engagely. Start your FREE 14-Day trial by clicking here.
- After receiving your activation email (don’t forget to check your spam folder), click the link to activate your account.
- Login to your account by clicking here.
- Now let’s create your first campaign.
Watch Video ->
Step 1
Click Install Script

Step 2
Copy the pixel code from the page.
Paste the code prior to the closing </head> tag in your website.
If you are unsure how to do this either have your website developer/manager do it or follow one of our guides.
View our Standard Integration Guide to do this in 4 easy steps.
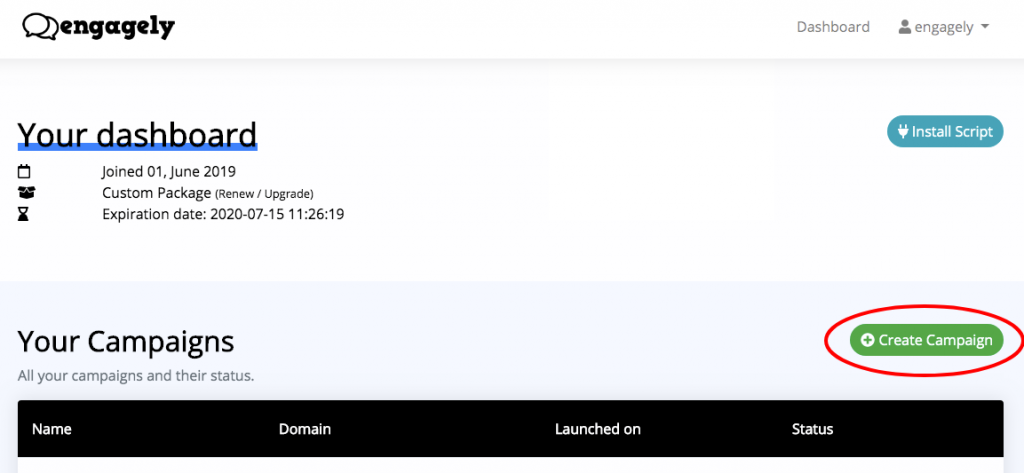
Step 3
Click Create Campaign
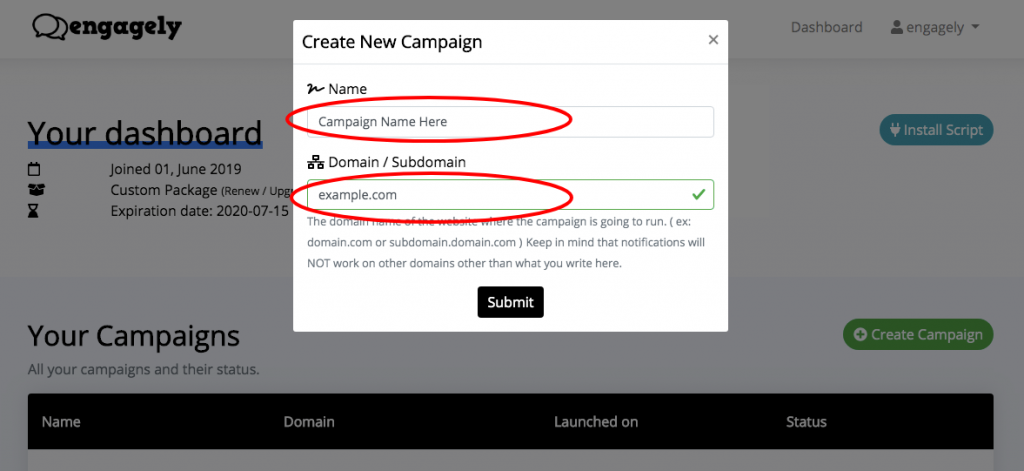
Step 4
Enter Campaign Name
Enter Domain
Click Submit
Step 5
Ensure your campaign is live by toggling the selector next to the campaign name. Blue = Live
Click create notification

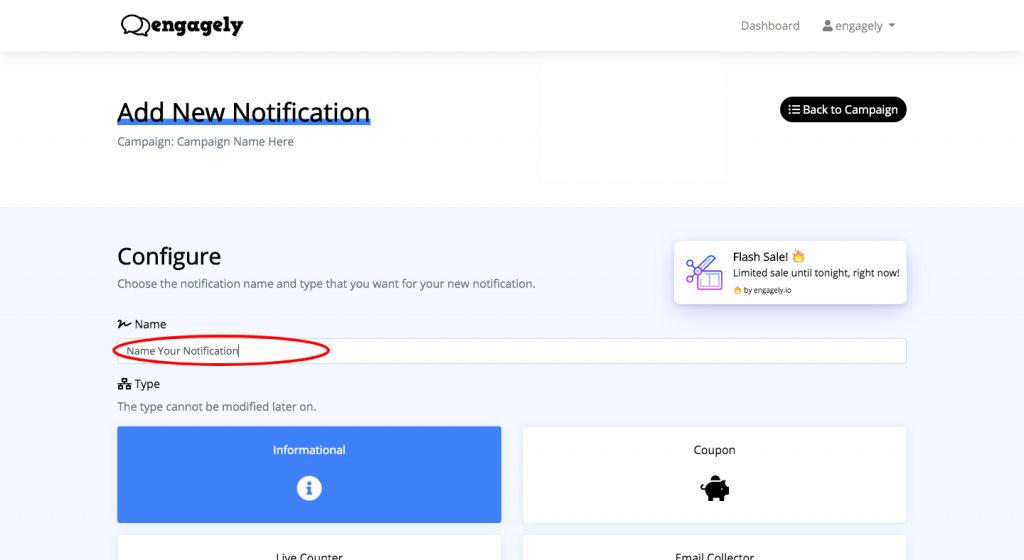
Step 6
Name your notification
Step 7
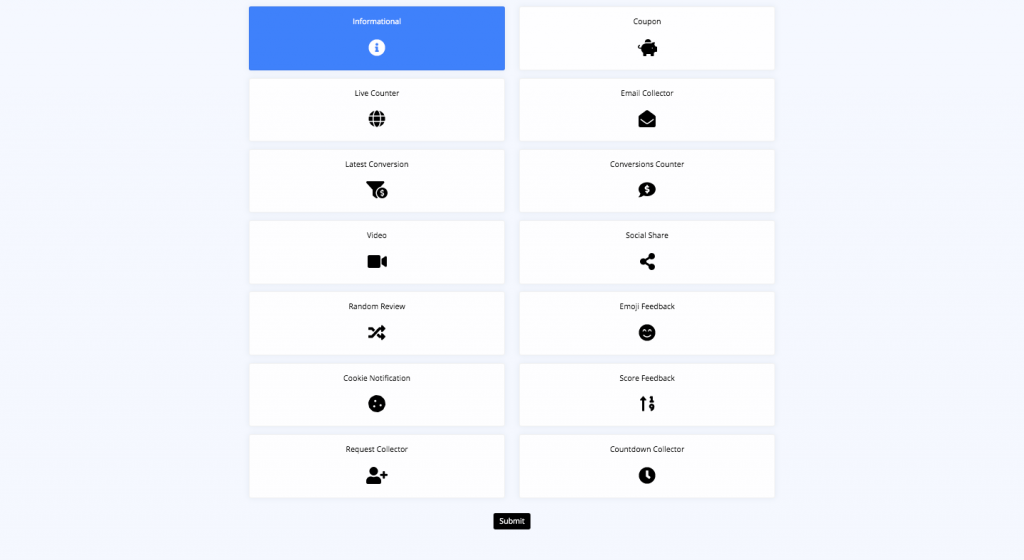
Select the type of notification you would like to create.
For a complete list of notification types which link to examples, visit our demos page.
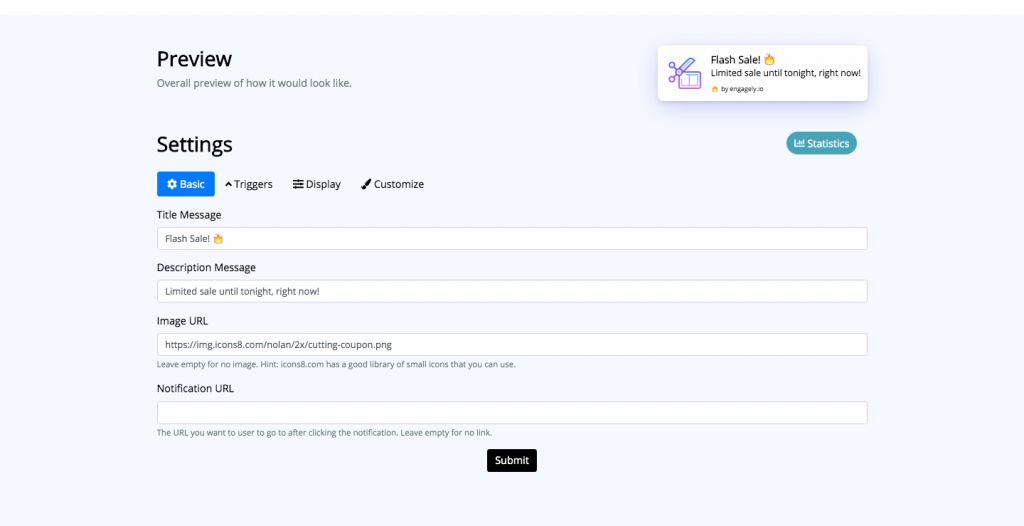
Step 8
Enter basic notification settings.
Step 9
Determine whether you want it to show on all pages, some pages or only one.
This screenshot shows the “All Pages” example.
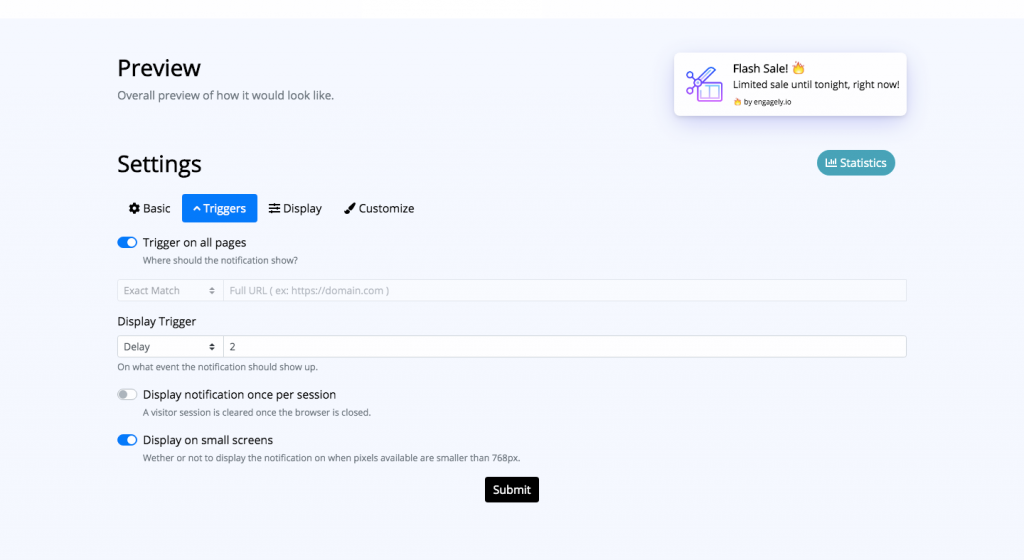
Step 10
If you only want to show your notification on some or only one page(s):
- Select Exact Match: Enter the exact page you want to show it on.
- Select Contains: Enter the patter of the url for the pixel to recognize the page
- Select Starts With: Enter the starting pattern of the url
- Select Ends With: Enter the ending pattern of the url

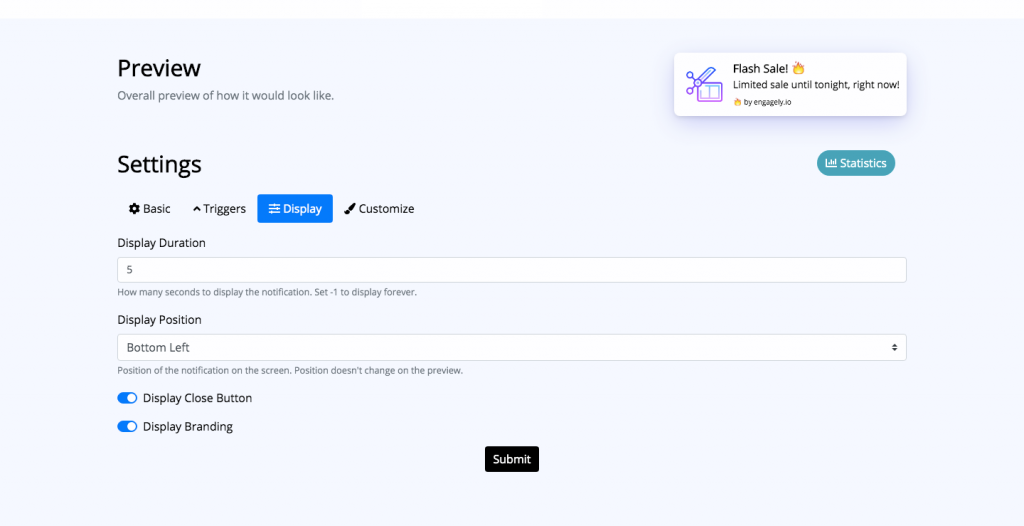
Step 11
Enter display settings such as how long it should show, the position where it shows, should there be an option to close it and whether you want to display branding (this option is only available to select packages.
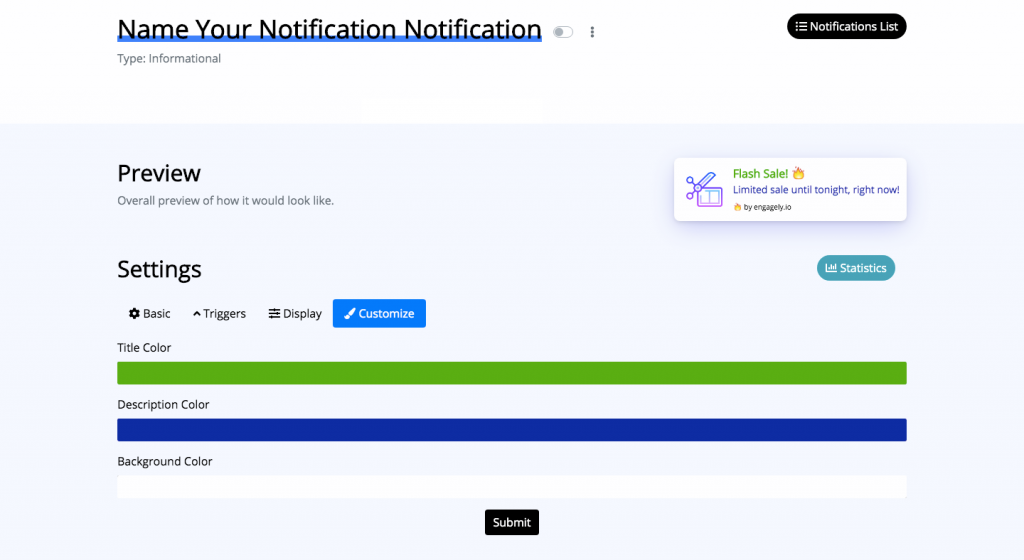
Step 12
Customize the color scheme of your notification by clicking each row and selecting the desired color.
IMPORTANT: “Click Submit” when done modifying all desired notification settings.
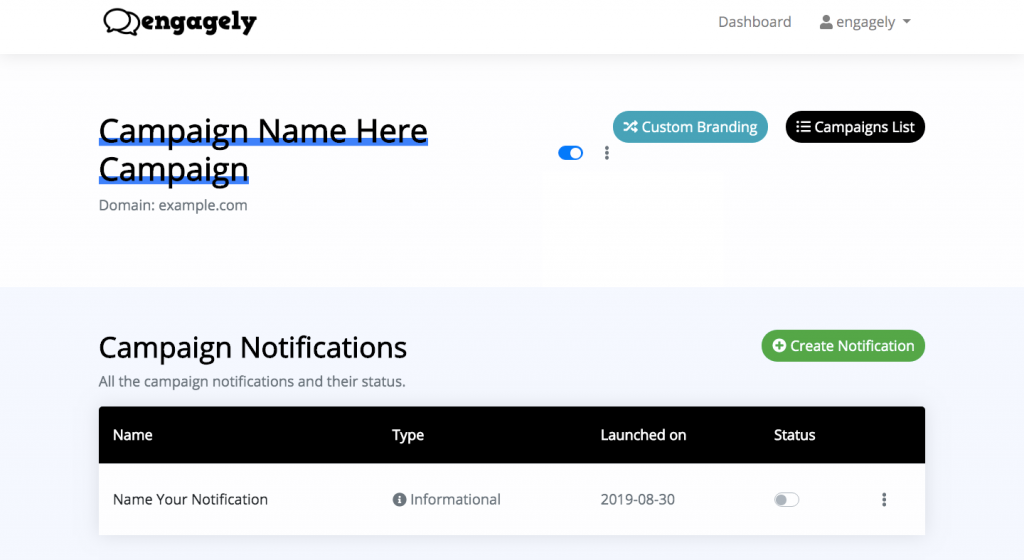
Step 13
If you clicked submit as mentioned in the previous step, you’ll return back to the notifications list page.
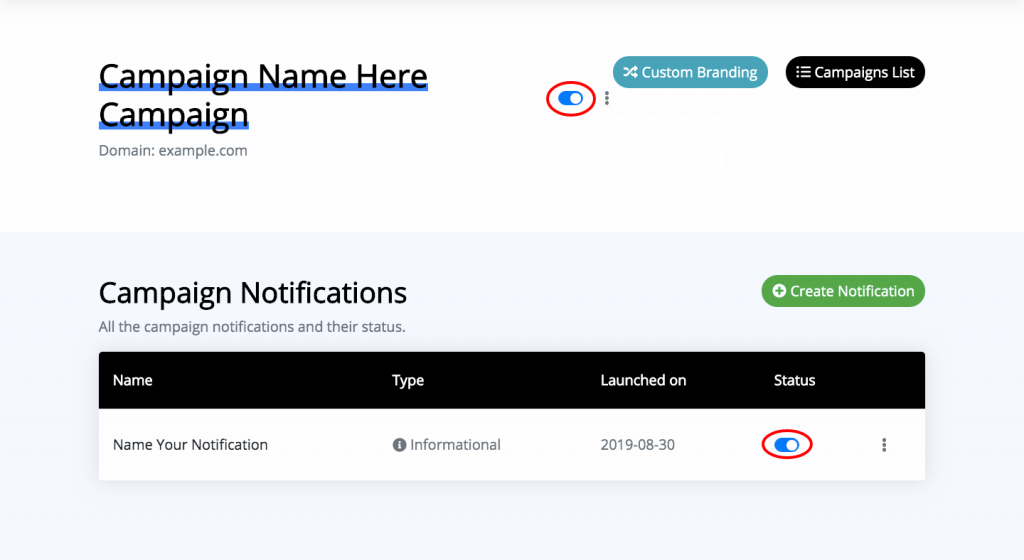
Step 14
Make sure both your campaign and notification(s) are live by ensuring both toggles shown in the screenshot are blue. If not, click to toggle active/inactive.
Remember: Blue = Live
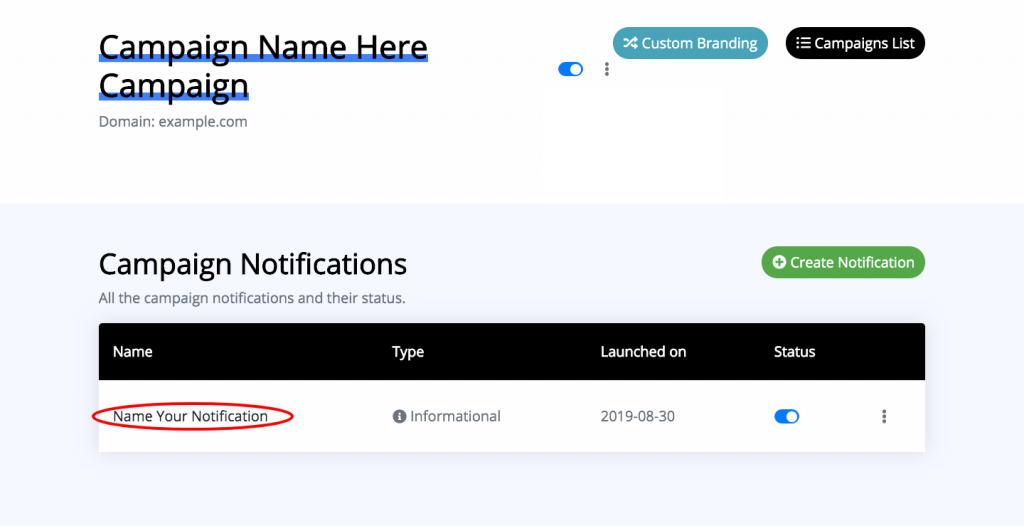
Step 15
From the notifications list, you can either Edit, View Statistics or Delete the notification by clicking the 3 dots shown all the way to the right.
Clicking these will bring up a menu to make your selection. Be careful when doing this. You don’t want to delete your notification by mistake.
You can also click the notification name to manage or view statistics as well.
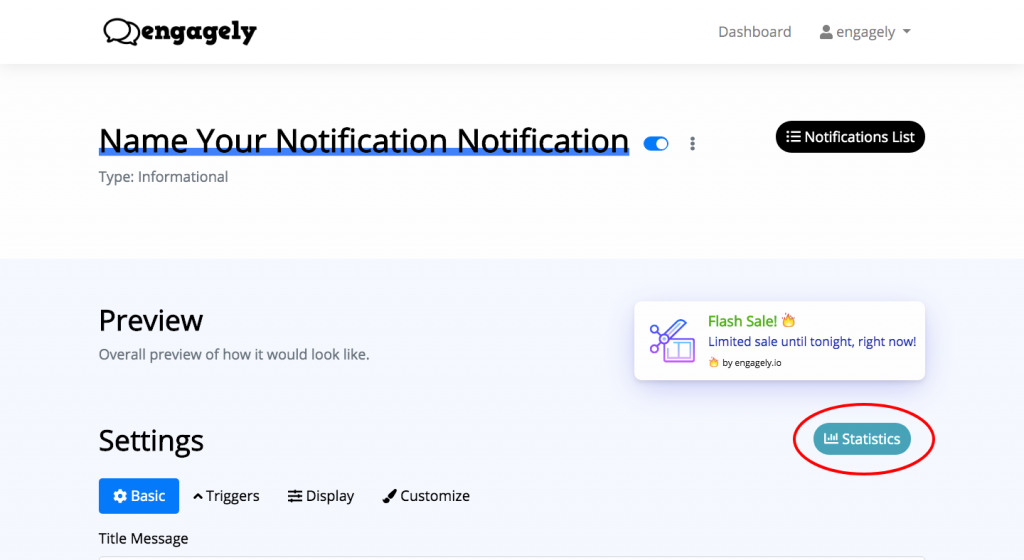
Step 16
To view statistics from the notification settings screen, you can click the statistics button shown highlighted.